How Do I Set Up Google Search Console?
Now that your website is ready it time to get found on Google search results. One key tool that can help you understand and improve how people find your site through Google is Google Search Console. Don't worry if this sounds complicated—it's not! Setting up Google Search Console is a simple process that can provide you with valuable information about your website's performance.
In this article, we'll walk you through each step of getting started with Google Search Console, using easy-to-understand language and clear instructions. By the end, you'll have access to important insights that can help you make your website more visible and appealing to visitors. Let's get started and make your website shine in Google search results!
Note: Before you begin we strongly recommend usning a custom domain. You can take advantage of the free domain with your premium subscription or you can connect a domain you already own.
How to Set Up Your Google Search Console
Follow these steps to add your website to Google Search Console.
Note: If you don't have a Google account, you'll need to create one. Tap HERE if you need information on creating a Google account.
*if your browser doesn't allow you to click the link copy and paste the following URL in the browser address bar:
https://support.google.com/accounts/answer/27441?hl=en
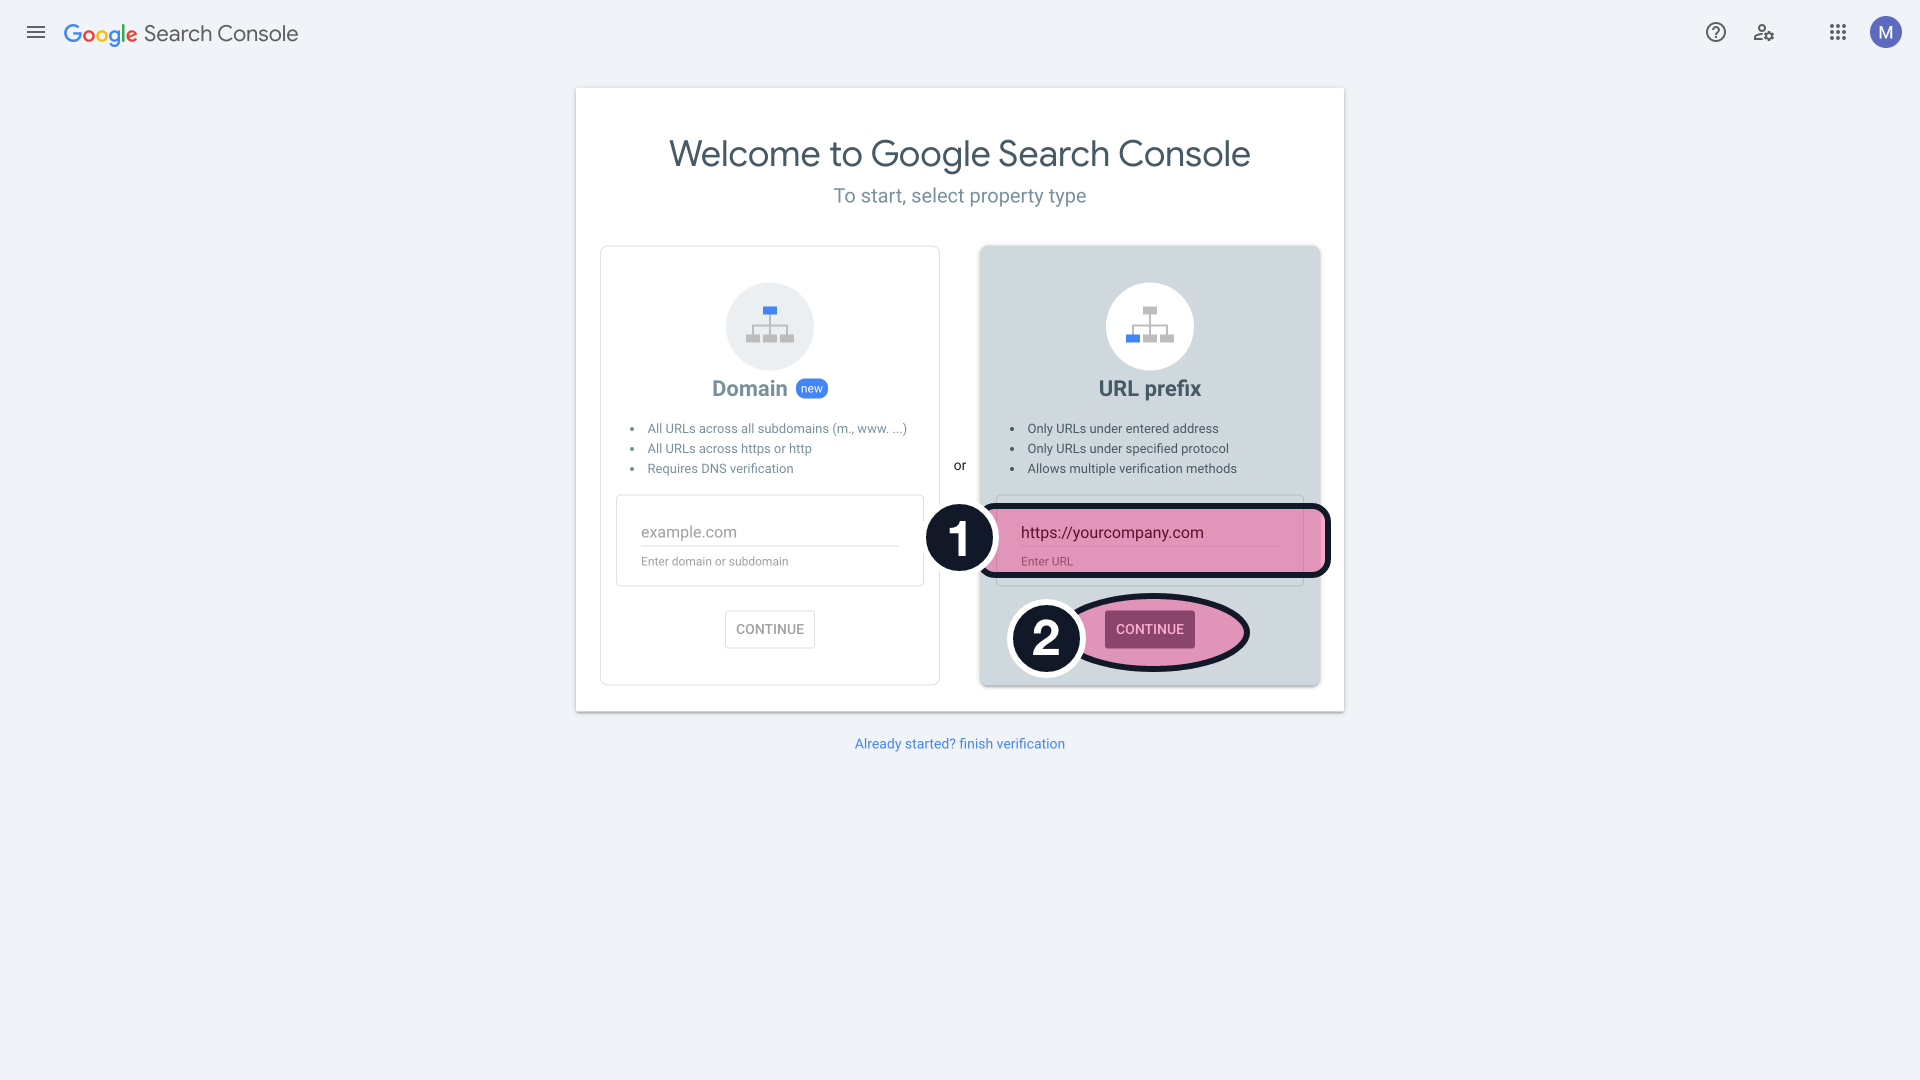
To begin go to Google Search Console (https://search.google.com/search-console) and sign in with your Google account.
- In the URL prefix side, enter the full URL of your website including https://
(for example https://yourcompany.com)
- Tap the Continue button.
Verify Ownership with HTML Tag
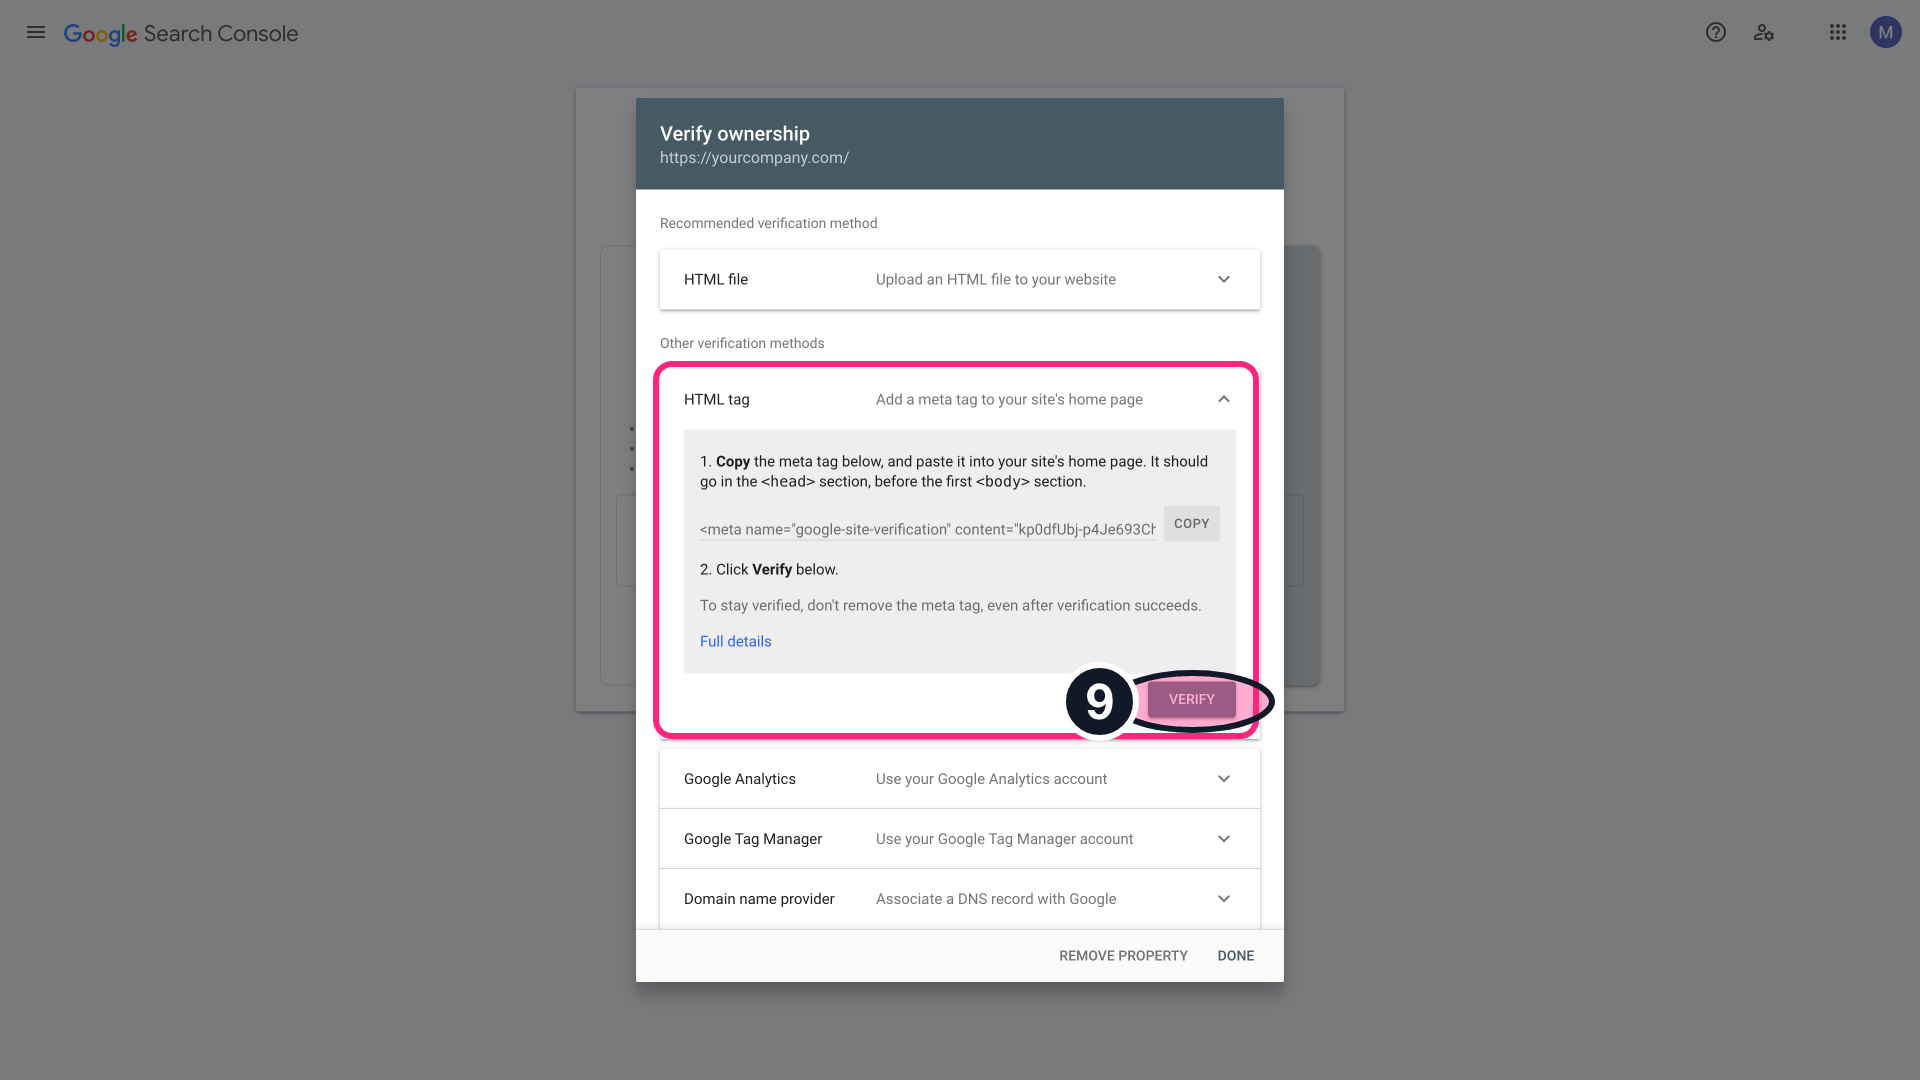
After entering your URL, you’ll be directed to the verification page. Under the HTML tag you'll see a piece of code.
- Tap the Copy button for the tag provided.

Add HTML Tag to Your Website
Tap HERE to go directly where you will add the code you just copied in step 3 above or
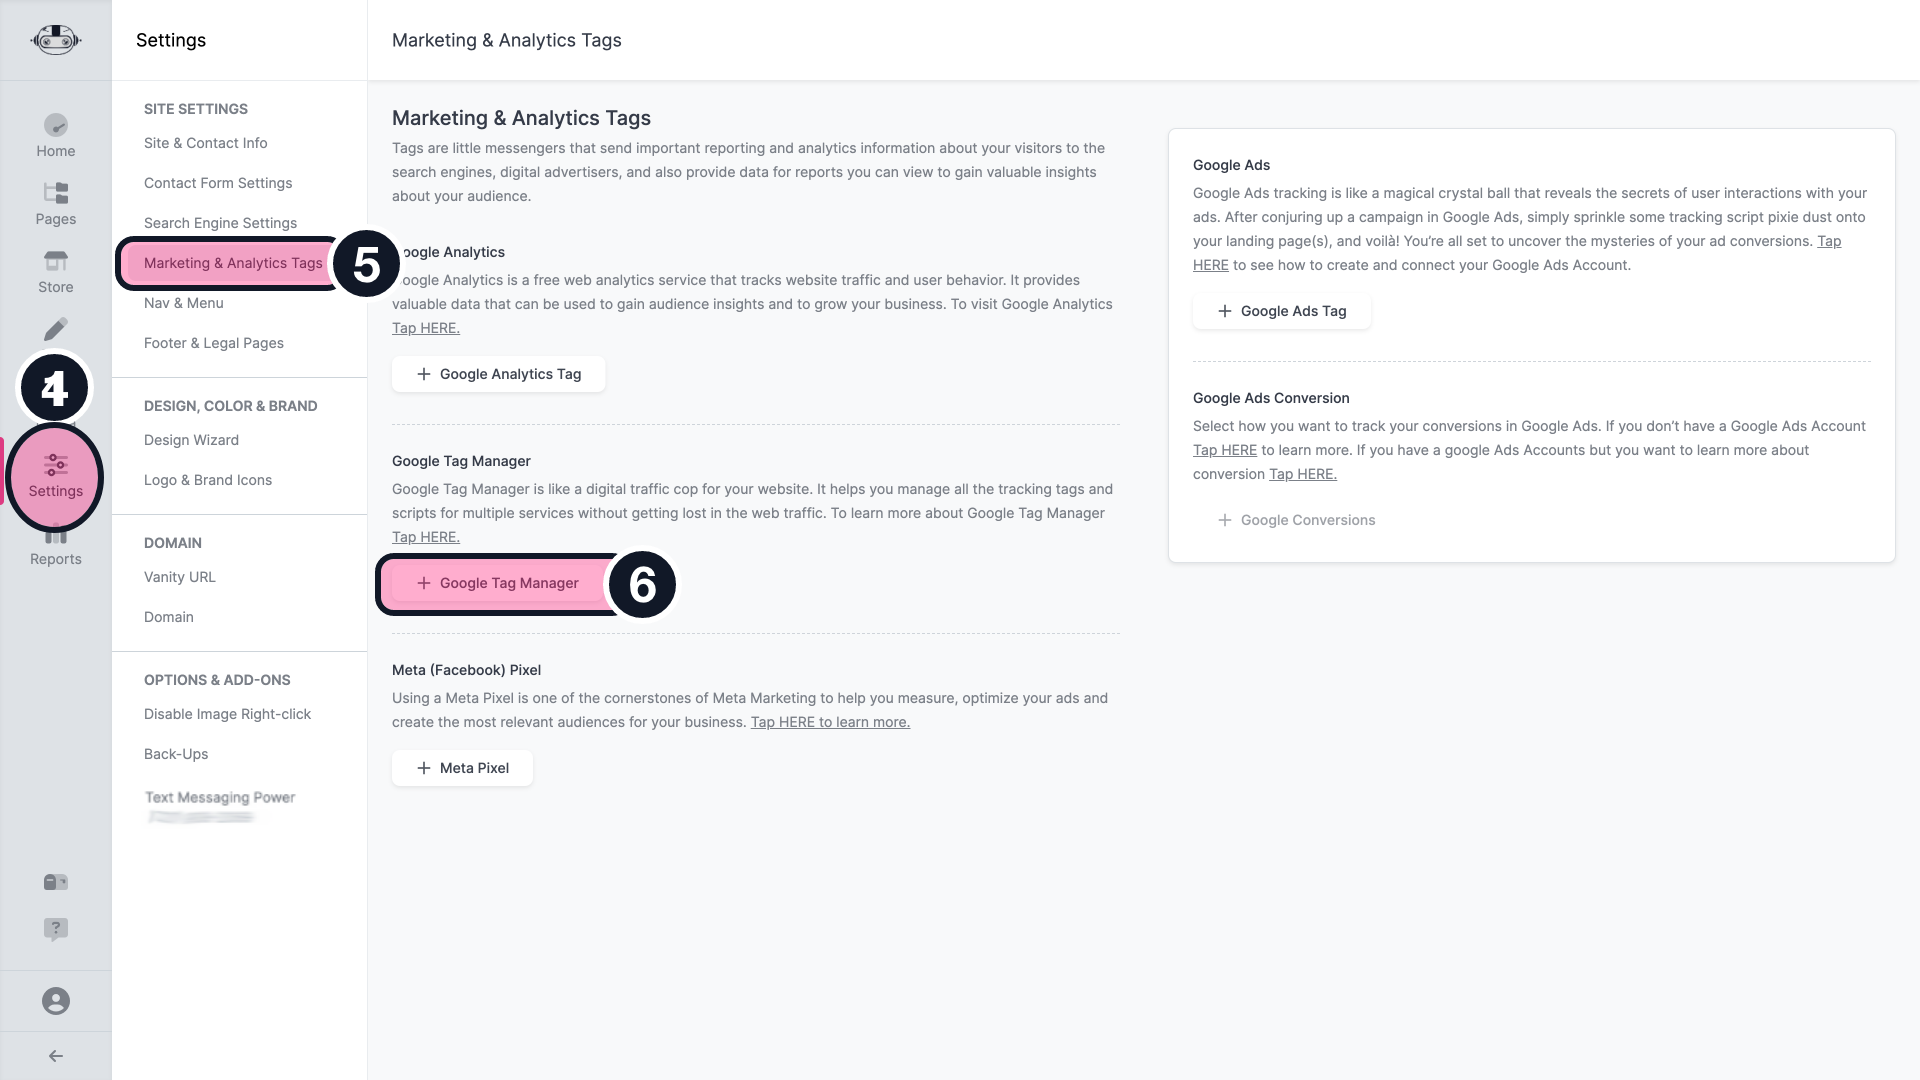
- From your TurnCage dashboard click Settings on the left side menu.
- Select Marketing & Analytics Tags.
- Choose Google Tag Manager to open the text box.
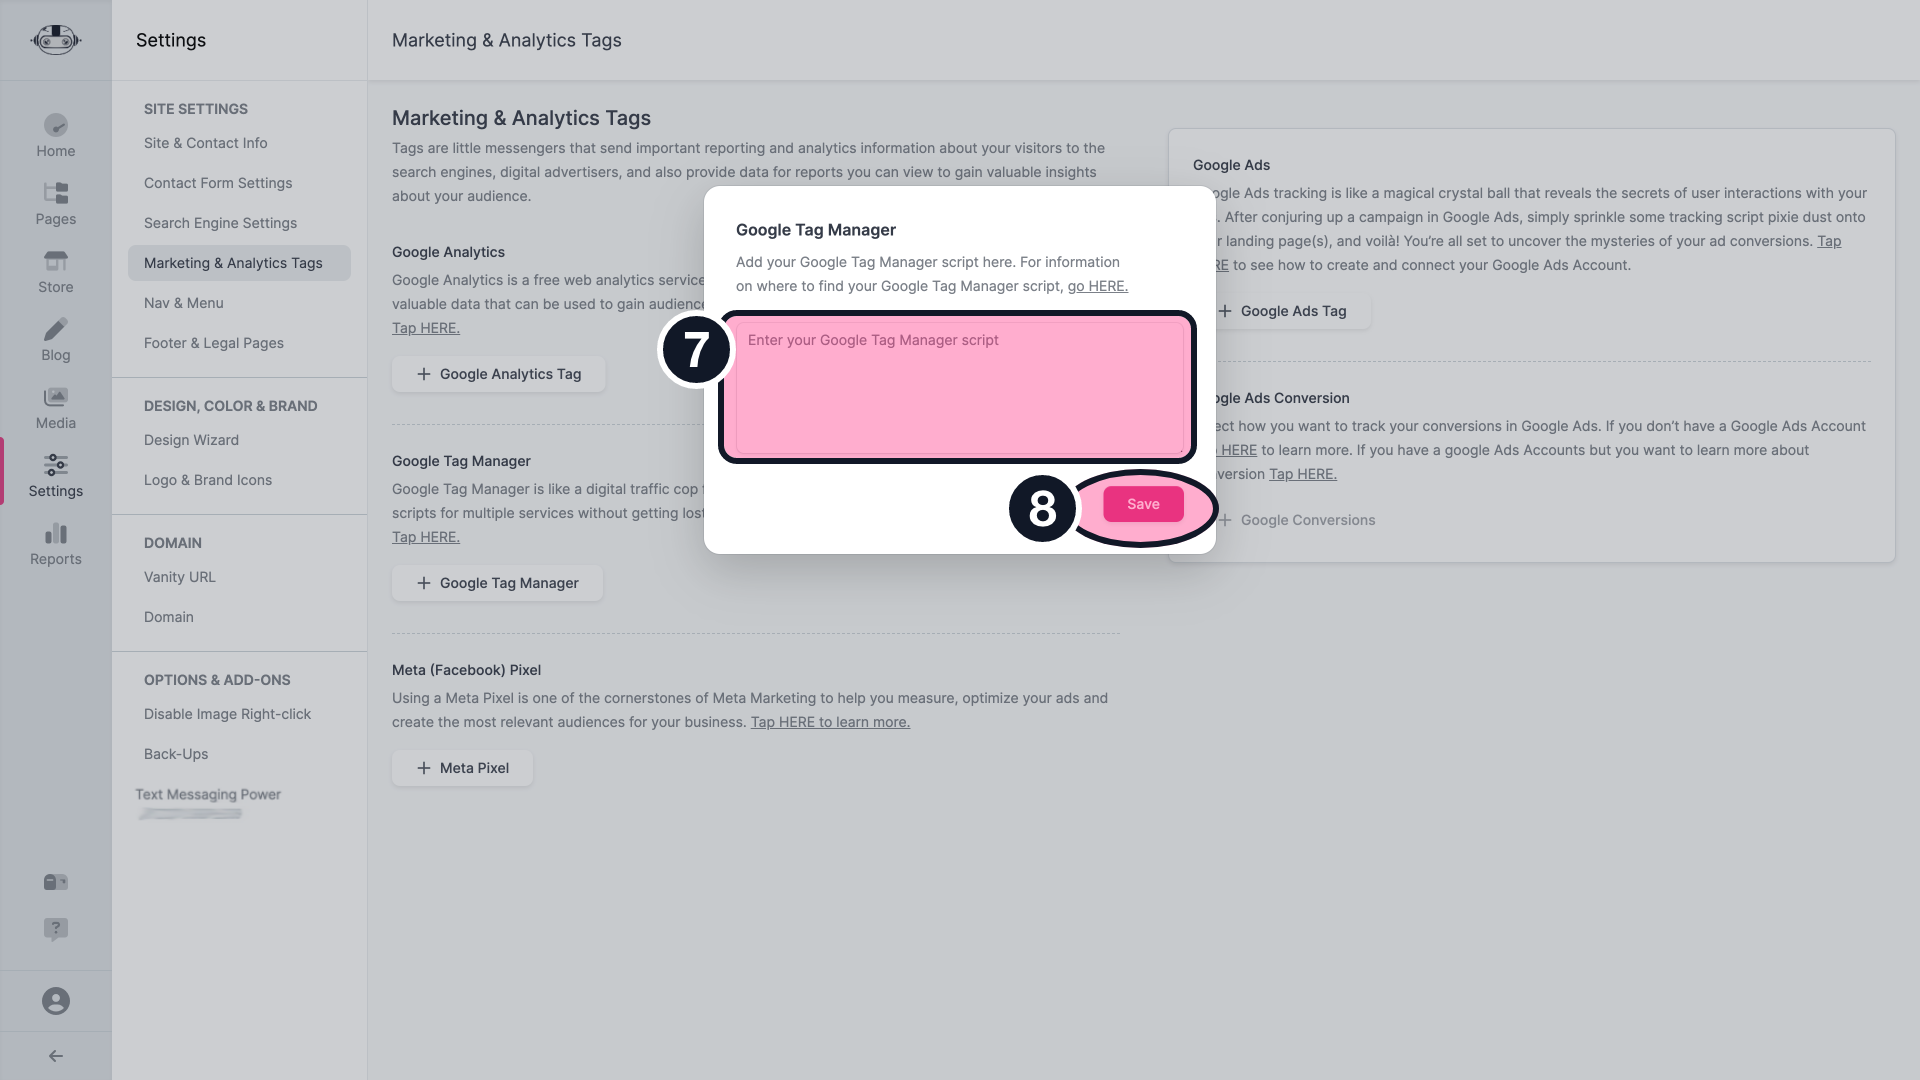
- Paste the code snippet from step 3 in the text area.
- Tap the Save button.
Confirm Ownership in Google Search Console
Return to Google Search Console.
- Click the Verify button at the bottom of the page.
Note: Google will check for the presence of the verification tag. If found, you’ll see a success message. If not, double-check to ensure you placed the tag correctly and that changes have been published.
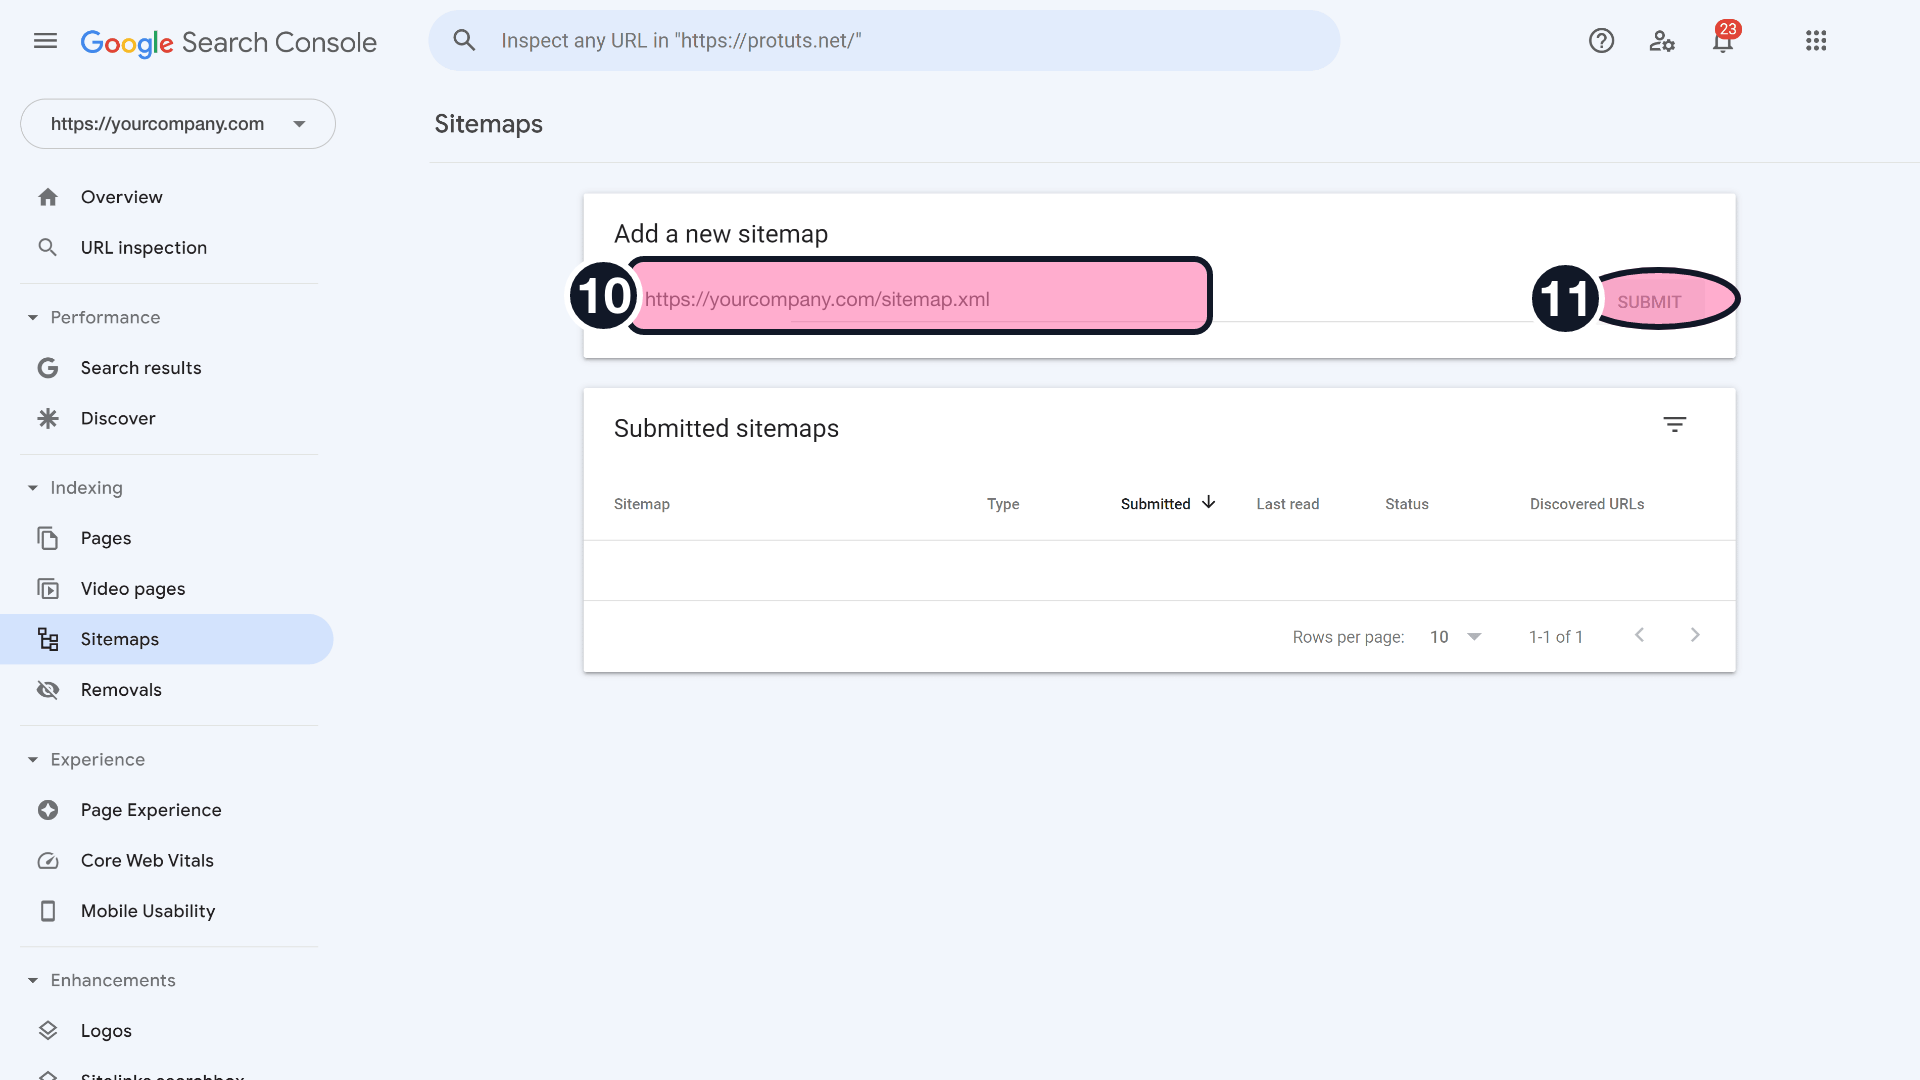
Add Your Sitemap
From the Google Search Console dashboard choose sitemap on the left side menu.
- Copy and paste your site map into the text area including the https://.
Your sitemap is https://yourcompany.com/sitemap.xml.
*replace yourcompany.com with your custom domain.
- Tap the Submit button.
That's it! You've successfully set up Google Search Console using the URL prefix and HTML tag for verification.